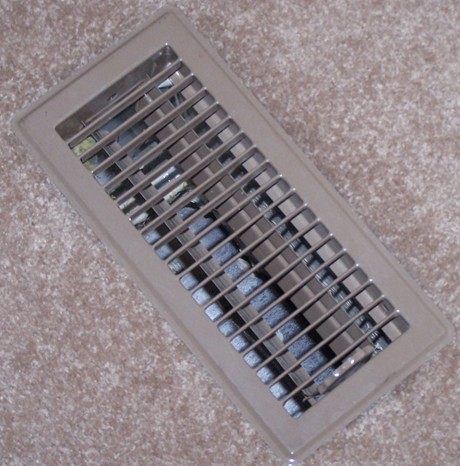
 The drywall dust settled on the kitchen counter like fine snow, the kind that gets into everything — coffee mugs, the toaster slots, the grout lines you just sealed. Late October in South Florida means the humidity has backed off, but the AC still runs most of the day, and the homeowner on NE 14th Avenue in Hallandale Beach was still wiping white film off the TV screen a week after the crew left. Every time the system kicked on, the vents coughed out little clouds. The master bedroom smelled like joint compound — that dry, chalky smell. The registers looked clean enough from below, but the real mess lived upstream, packed into the trunk lines (the big main ducts) and return boxes where no flashlight reaches.
What gets left behind after a remodel?
Drywall compound, sawdust, insulation fibers, and tile grout dust don't just disappear when the contractors sweep the floor. The HVAC system runs during demo and build-out, pulling that particulate straight into the supply and return lines. In South Florida homes, attic heat bakes the material onto the inner duct walls until it resists a quick vacuum pass. The finer the dust — joint compound especially — the deeper it penetrates, settling in bends, at takeoffs (the spots where small branch ducts split off the main line), and at the bottom of vertical risers.How do I prep the system before I start?
Turn off the air handler at the breaker, not just the thermostat. You don't want the blower firing while you're working. Remove every register cover in the house — floor, wall, and ceiling. Tape heavy plastic or contractor bags over each opening with painter's tape, leaving one supply register open at the far end of the system to serve as your exhaust port. That register becomes the only path for air and debris to exit while you work the other branches.Why leave one register open as the exhaust?
Think of the range hood over your stove. When it's running and you wipe the cooktop, every wisp of steam drifts toward the one big opening — because that's the only way out. Sealing every register except one turns your duct system into the same one-exit setup: while the shop vac pulls at the exhaust register, every bit of loosened dust from the branch you're brushing gets dragged toward that single open path instead of blowing into a clean room. Or picture a flooded tub with one drain. Tip a bucket of water in at the far end and it slides across and funnels down the drain. The shop vac at the exhaust register is the drain; the dust you knock loose in each branch is the water. Keep the other registers sealed and the air can only leave the way you want it to.What tools actually work for DIY duct cleaning?
A shop vac with a long flexible hose — long enough to reach from your hallway to the farthest register. A flexible dryer-vent brush kit with extension rods you connect section by section; the kind with a drill attachment works faster than hand-cranking. Microfiber cloths for wiping register boots. A new filter cut to size for your return grille — MERV (Minimum Efficiency Reporting Value) 11 or 13, a rating of how small the particles it can trap are. Skip the leaf blower and the compressed air cans for indoor work; they just redistribute dust into rooms you already cleaned. If you have a negative-air machine, great, but a strong shop vac on the exhaust register creates enough pull for a single-story home.How do I clean each branch run without making a mess?
Work one register at a time. Pull the plastic off a single supply, feed the brush head into the boot, and push toward the trunk line while the shop vac runs at the exhaust register. Go slowly — a couple of feet per minute — so the brush bristles flick debris into the airflow instead of packing it tighter. When the brush hits a junction, rotate it a quarter turn to catch the side takeoff. Pull back, wipe the brush clean, repeat. Do this for every supply branch, then move to the return side, covered in the section below.The video below, "DIY - Clean Your Air Heat Vents," is a homeowner-made walkthrough — the uploader couldn't find any DIY duct-cleaning videos, only professional company ones, so he filmed his own job with a shop vac and a leaf blower. It shows the same branch-by-branch approach this guide describes.
What the video shows, in plain terms: a regular homeowner cleaned his own air and heat vents because no DIY instructions existed online — every video he found came from a professional company. His method pairs a shop vac (he lists a 6-gallon Craftsman) with a leaf blower to move loosened dust through the whole system, and the gear list in the video description is refreshingly ordinary: a vent cleaning brush, magnetic vent covers, a replacement furnace filter, duct spray cleaner, and the shop vac. Nothing rented, nothing specialized. Watch how the air moves toward the open registers while he works — that's the same pull-toward-the-exit idea from the exhaust-register section above. The video earned its place here because it proves the same point this guide makes: with sealed registers and one exhaust path, an ordinary shop vac does the heavy lifting.
Why does the return side need extra attention?
The return plenum — the large metal box connected to the air handler — is where the largest volume of air, and dust, moves. During renovation the filter either clogged fast or got removed entirely, letting everything pass into the blower cabinet and coil. Remove the filter grille, vacuum the filter rack, then brush the plenum walls, vacuum the blower compartment if you can reach it, and shine a light into the coil fins. If you see a gray mat on the fins, that's a job for a pro with a coil cleaner and low-pressure rinse. Don't spray anything yourself; bent fins kill airflow and void warranties.How do I know when the ducts are clean enough?
Reinstall all registers, put the new filter in, and run the fan only for about twenty minutes. Hold a white coffee filter or piece of printer paper over a supply register in the room farthest from the air handler. If it stays clean — no visible dust puff — you're good. If it grays, repeat the branch cleaning on that run. Check the filter after 48 hours of normal cooling; a light gray coating is normal, a thick cake means more debris remains upstream.When to call us
If the dust comes back fast, if you smell musty odors when the AC starts, if you find torn flexible ductwork, or if the coil looks coated, the debris has migrated past what a shop vac can reach. Call Hallandale Air Duct Care at (754) 432-8931 — we serve Hallandale Beach and Broward, Monday through Saturday, 8 AM to 8 PM. Two honest don'ts: don't call us just to change a filter or wipe one dusty register — that's a five-minute job. And suspected asbestos in old duct wrap needs a licensed abatement contractor, not a duct cleaner; we'll tell you that on the phone instead of selling you a visit.By Air Duct Specialist, Hallandale Air Duct Care. Published October 21, 2026; last reviewed October 21, 2026.